Search by category:

It’s not uncommon for LCD TV screens to become damaged. Whether it’s from an accidental drop or a wayward ball, a cracked LCD TV screen can ruin your viewing experience. If you’re in the market for a replacement LCD TV screen, there are a few things you’ll need to take into account to ensure you get the right one. In this blog post, we’ll run through everything you need to know about measuring for a replacement LCD TV screen.

Check out Androidtermurah before making your next gadget or appliances purchase! Androidtermurah.com a website providing guide, articles, tips and expert deal hunter who picks the highest quality tech products at the best prices available.

The first thing you’ll need to do is take a look at the back of your TV to find the model number. This will be located somewhere on the back of the TV, usually near the inputs or on a label. Once you have the model number, you can use it to look up the dimensions of the TV. Make sure to double check the dimensions of the TV against your measurements to ensure you’re getting the right size.

Next, you’ll need to measure the width and height of the screen. To do this, you’ll need to measure from the inside of the bezel (the frame around the screen) to the opposite inside edge. Make sure to measure in several places and take an average to get an accurate measurement.

Now that you have the width and height of the screen, you can start shopping for replacement screens. Make sure to pay attention to the resolution of the replacement screen as well as the dimensions. The resolution is the number of pixels that make up the image on the screen, and you’ll want to make sure it’s the same or higher than the resolution of your current screen.

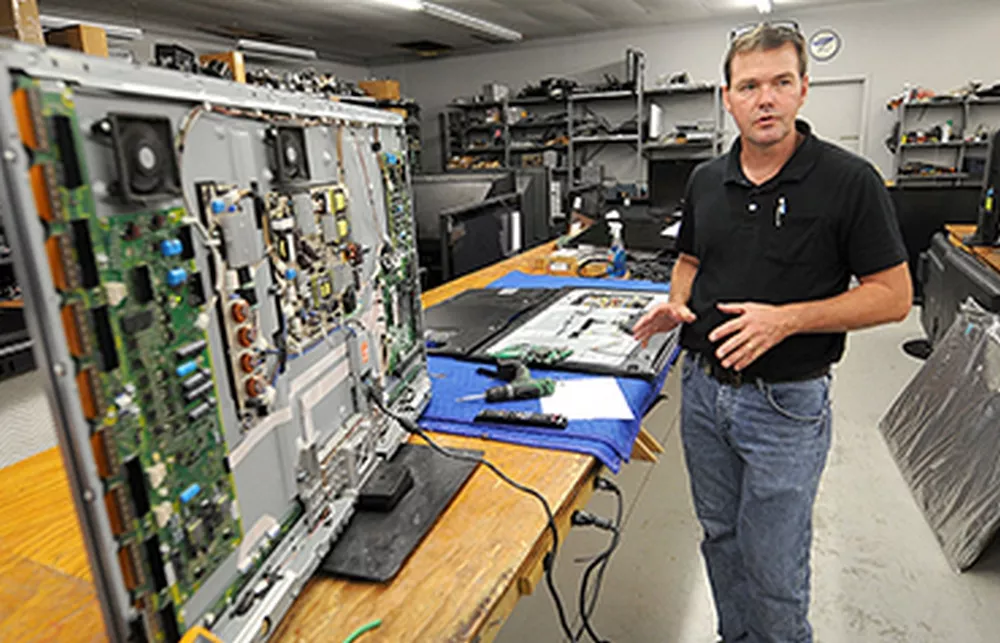
Once you’ve found a replacement screen that meets your needs, all that’s left to do is install it. Depending on your TV, this process will vary. However, most TVs will require you to remove the back panel to access the screen. Once you have access to the screen, you’ll need to disconnect the old screen and connect the new one. Make sure to follow the instructions that come with your replacement screen for the best results.

And that’s everything you need to know about measuring for and installing a replacement LCD TV screen.

When it comes to tablets, there are two that always seem to be at the forefront of the discussion: the iPad Pro and the Surface Pro. Both are great devices with plenty to offer, but which one is the best value for money?

To answer that question, we need to take a look at what each tablet has to offer and how much it costs. Let’s start with the iPad Pro.

The iPad Pro is Apple’s flagship tablet. It comes in two sizes: the 12.9-inch model and the 9.7-inch model. It’s powered by Apple’s A9X processor and has 4GB of RAM. It also comes with a great camera, a large and high-resolution display, and support for the Apple Pencil.

The iPad Pro starts at $799 for the 32GB model and goes up to $1079 for the 128GB model. If you want the cellular version, it’ll cost you an extra $130.

However, there are a few information, deals and trends about Apple product. Yiphoneapps is a blog having quality posts about Apple
trends and updates written by experienced writers.

Now let’s take a look at the Surface Pro.

The Surface Pro is Microsoft’s flagship tablet. It comes in four different sizes: the 12.3-inch model, the 13.5-inch model, the 15-inch model, and the 17-inch model. It’s powered by Intel’s 7th generation Kaby Lake processors and has 4GB or 8GB of RAM.

The Surface Pro starts at $799 for the 128GB model and goes up to $2699 for the 1TB model. If you want the LTE version, it’ll cost you an extra $100.

So, which tablet is the best value for money?

The answer to that question depends on what you’re looking for. If you want the best camera and the largest and highest-resolution display, then the iPad Pro is the better value for money. If you want a larger screen and more powerful processors, then the Surface Pro is the better value for money.

In the end, it all comes down to what you need and what you’re willing to pay for it.

If you’re looking for a great VR experience but don’t want to spend a lot of money, you’re in luck. There are plenty of budget VR headsets on the market that will give you a taste of what virtual reality has to offer without breaking the bank.

Check out Androidtermurah
before making your next gadget or appliances purchase!
Androidtermurah.com a website providing guide, articles, tips and expert
deal hunter who picks the highest quality tech products at the best
prices available.

In this article, we’ll take a look at nine of the best budget VR headsets you can buy in 2023. We’ll also provide a buyer’s guide to help you choose the right headset for your needs.

So, without further ado, here are the 9 best budget VR headsets you can buy in 2023:

Google Cardboard

Google Cardboard is perhaps the most well-known budget VR headset. It’s a simple cardboard viewer that you can assemble yourself, and it works with both Android and iOS smartphones.

Cardboard is a great entry-level VR headset, and it’s perfect for those who want to try VR for the first time. It’s also very affordable, with prices starting at just $15.

Oculus Go

Oculus Go is a standalone VR headset that was released by Facebook’s Oculus division in 2018. It’s a great headset for those who want a standalone VR experience without having to connect it to a computer or gaming console.

The Oculus Go is very affordable, with prices starting at just $200. It’s also one of the most comfortable VR headsets on the market, thanks to its soft fabric lining and adjustable straps.

Samsung Gear VR

Samsung’s Gear VR is another popular budget VR headset. It’s a mobile headset that works with select Samsung smartphones, and it offers a great VR experience thanks to its built-in sensors and high-resolution display.

The Gear VR is very affordable, with prices starting at just $130. However, you will need to buy a compatible Samsung smartphone to use it, which can add to the cost.

Sony PlayStation VR

Sony’s PlayStation VR is a great option for those who own a PlayStation 4 gaming console. It’s one of the most popular VR headsets on the market, and it offers a great VR experience thanks to its high-resolution display and built-in sensors.

The PlayStation VR is very affordable, with prices starting at just $200. However, you will need to buy a PlayStation 4 to use it, which can add to the cost.

HTC Vive

HTC’s Vive is a high-end VR headset that offers a great VR experience. It’s one of the most expensive VR headsets on the market, but it’s also one of the best.

The Vive is very expensive, with prices starting at $800. However, it comes with a lot of features and accessories, such as a pair of motion controllers and a base station.

Oculus Rift

Oculus Rift is another high-end VR headset that offers a great VR experience. It’s similar to the HTC Vive, but it’s a bit cheaper.

The Oculus Rift is very expensive, with prices starting at $600. However, it comes with a lot of features and accessories, such as a pair of motion controllers and a base station.

Google Daydream View

Google’s Daydream View is a mobile VR headset that works with select Android smartphones. It offers a great VR experience thanks to its built-in sensors and high-resolution display.

The Daydream View is very affordable, with prices starting at just $100. However, you will need to buy a compatible Android smartphone to use it, which can add to the cost.

Lenovo Mirage Solo

Lenovo’s Mirage Solo is a standalone VR headset that was released in 2018. It’s a great headset for those who want a standalone VR experience without having to connect it to a computer or gaming console.

The Mirage Solo is very expensive, with prices starting at $400. However, it’s one of the most comfortable VR headsets on the market, thanks to its soft fabric lining and adjustable straps.

Xiaomi Mi VR

Xiaomi’s Mi VR is a mobile VR headset that works with select Xiaomi smartphones. It offers a great VR experience thanks to its built-in sensors and high-resolution display.

The Mi VR is very affordable, with prices starting at just $25. However, you will need to buy a compatible Xiaomi smartphone to use it, which can add to the cost.

It seems like only yesterday that the iPad was released. And yet, in the short time since its inception, the iPad has revolutionized the way we interact with technology.

One of the many ways in which the iPad has changed the game is in the realm of photography. The iPad’s high-resolution Retina Display makes it the perfect platform for viewing and editing photos. And with the release of the iPad, Apple has made it even easier to import photos from your digital camera to your iPad.

In this article, we’ll show you how to download pictures from your camera to your iPad in five easy steps.

First, connect your digital camera to your iPad using the iPad’s Dock Connector to USB Cable.

Then, launch the Photos app on your iPad.

Next, tap the Import tab at the bottom of the screen.

Now, select the photos you’d like to import from your camera. To select multiple photos, simply tap on each photo you’d like to import. To select all photos, tap the Select All button.

Finally, tap the Import Selected button in the upper-right corner of the screen.

That’s all there is to it! In just a few simple steps, you can easily import photos from your digital camera to your iPad.

It is now possible to take pictures with your iPad. This is a great feature that allows you to take advantage of the high resolution camera that is built into the device. Here are 5 easy steps to follow in order to download pictures from your camera to your iPad.

-Connect the iPad to your computer using the USB cable that came with the device.

-Launch the Image Capture application on your computer. This can be found in the Applications folder on a Mac or in the Start menu on a Windows PC.

-Select the iPad from the list of devices in the left hand panel of the Image Capture window.

-Select the pictures that you want to download from the main window of Image Capture.

-Click on the Download button in the bottom right hand corner of the window.

Your pictures will now be downloaded to your computer. You can then sync them to your iPad using iTunes or transfer them to a folder on your hard drive.