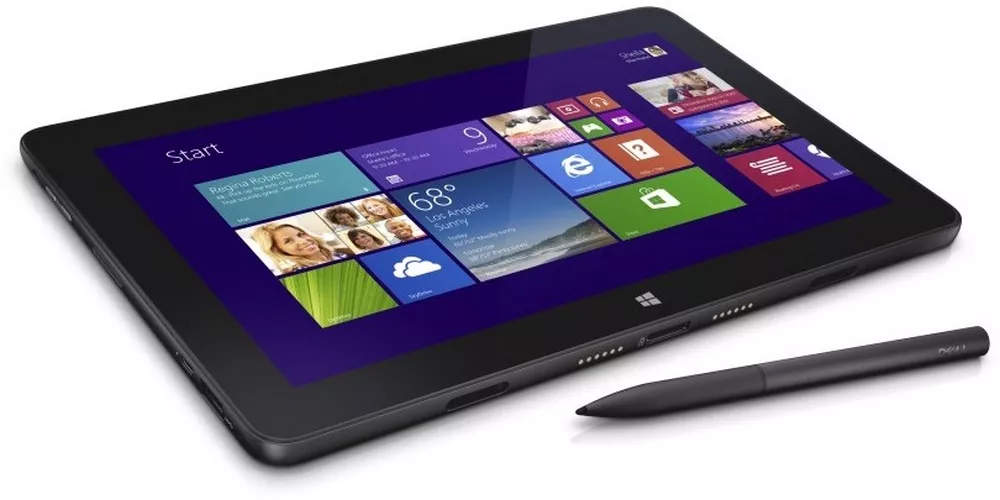
Search by category:

By now, you’ve probably gotten the hang of using your new Dell Intel Tablet. But just in case you’re still getting used to things, we’ve put together a list of 10 tips and tricks to help you get the most out of your device.

Check out Androidtermurah before making your next gadget or appliances purchase! Androidtermurah.com a website providing guide, articles, tips and expert deal hunter who picks the highest quality tech products at the best prices available.

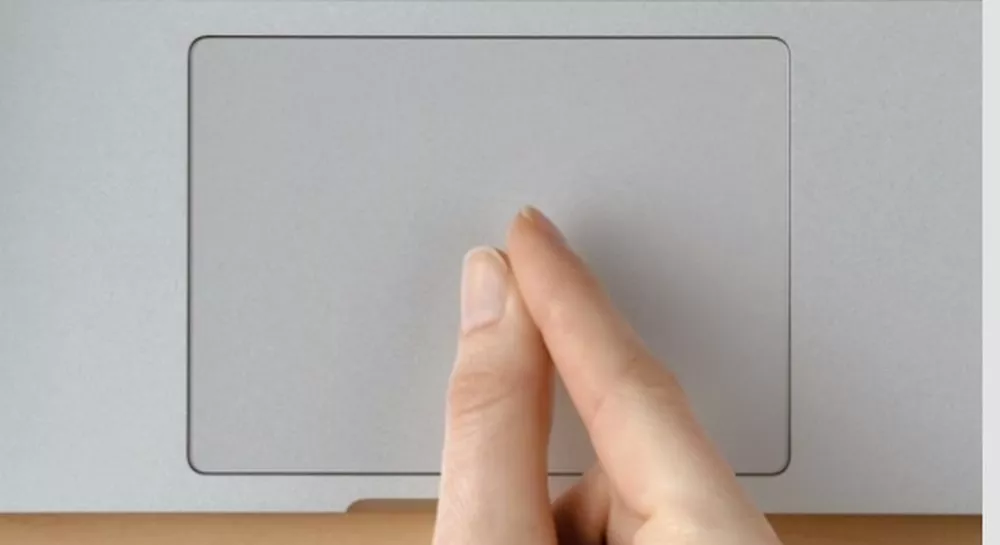
Get to know the touchscreen

The touchscreen is the most important part of your Dell Intel Tablet – after all, it’s how you’ll be interacting with all your apps and content. So it’s worth taking some time to get to know how it works. Experiment with different ways of tapping, swiping and pinch-to-zoom. And don’t forget about all the other ways you can interact with the touchscreen, like using the on-screen keyboard or writing with a stylus.

Use the keyboard shortcuts

There are plenty of keyboard shortcuts that can make using your Dell Intel Tablet even easier. For example, you can quickly open the settings menu by pressing the Windows key + I. Or take a screenshot by pressing the Windows key + Print Screen. To see a full list of keyboard shortcuts, just open the settings menu and go to “Keyboard shortcuts”.

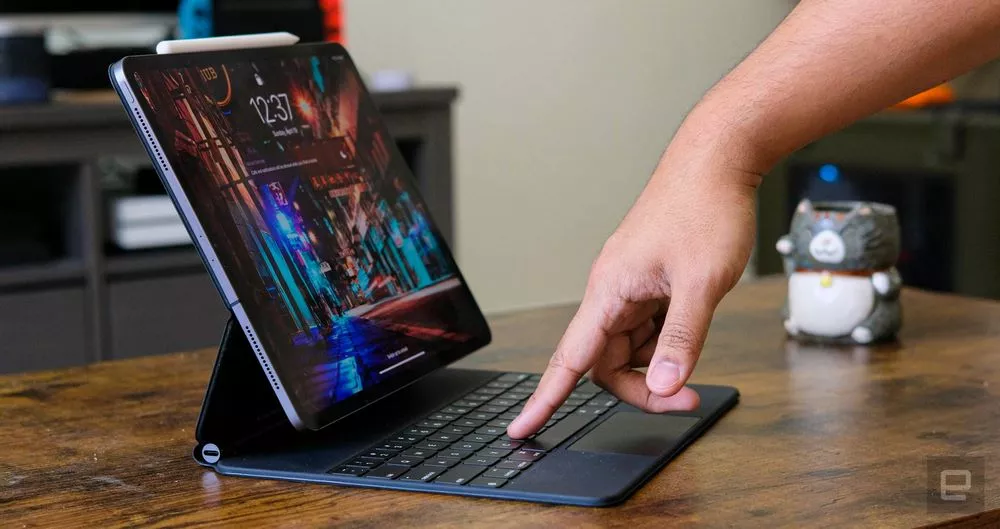
Connect a Bluetooth keyboard and mouse

If you want to use your Dell Intel Tablet like a mini laptop, then you’ll need to connect a Bluetooth keyboard and mouse. This will make it much easier to type and navigate around your device. To connect a Bluetooth keyboard or mouse, just open the settings menu and go to “Bluetooth”.

Install the Dell Tablet Dock

The Dell Tablet Dock is a great way to turn your Dell Intel Tablet into a mini desktop computer. Just dock your tablet in the dock and you’ll have access to a full-sized keyboard, mouse and monitor. You can even connect other peripherals, like a printer or scanner.

Get familiar with the apps

There are a ton of apps available for your Dell Intel Tablet, so it’s worth taking some time to explore what’s out there. Start by opening the “Store” app and browse through the featured apps. You can also search for specific apps using the search box. And don’t forget to check out the “Top Free” and “Top Paid” lists to see what’s popular.

Customize the home screen

You can customize the home screen on your Dell Intel Tablet to suit your needs. Just open the settings menu and go to “Home screen”. Here you can add and remove apps, change the wallpaper and more.

Use your tablet as a second screen

If you have a laptop or desktop computer, you can use your Dell Intel Tablet as a second screen. This is great for working on two things at the same time or for giving presentations. To set this up, just open the settings menu and go to “Display”.

Take advantage of the sensors

Your Dell Intel Tablet has a number of built-in sensors that can be used by apps and games. For example, the accelerometer can be used to detect when you tilt your tablet. And the gyroscope can be used for gaming or augmented reality. To see a full list of sensors, just open the settings menu and go to “Sensors”.

Use your tablet as a phone

Did you know that you can use your Dell Intel Tablet as a phone? Just install a VoIP app like Skype and you’ll be able to make calls over the internet. You can even use your tablet to send and receive text messages.

Connect to a projector or TV

If you want to share your tablet’s screen with a group of people, you can connect it to a projector or TV. This is great for giving presentations or watching movies. To do this, just open the settings menu and go to “Display”.

If you’re a PC user, you’re probably accustomed to using the right-click of your mouse to access a contextual menu. On a MacBook Pro, you can right-click by pressing the Control key and then clicking the mouse button, or by tapping with two fingers on the trackpad.

However, there are a few information, deals and trends about Apple product. Yiphoneapps is a blog having quality posts about Apple trends and updates written by experienced writers.

You can also enable a “Secondary click” in the Mouse & Trackpad system preferences. With this option enabled, you can right-click by clicking with two fingers on the trackpad, or by clicking the mouse button while holding down the Option key.

If you’re a long-time Windows user, you might be wondering how to right-click on a MacBook Pro. While there is no dedicated right-click button on Apple’s laptop, that doesn’t mean you can’t right-click. In fact, there are several ways to do it.

Here’s how to right-click on a MacBook Pro:

Use the trackpad

The easiest way to right-click on a MacBook Pro is to use the trackpad. Simply place two fingers on the trackpad and click. This will bring up a contextual menu with various options, depending on where you’re clicking.

Use the keyboard

If you don’t want to use the trackpad, you can also right-click on a MacBook Pro using the keyboard. To do this, simply hold down the Control key while you click. This will bring up the same contextual menu as the trackpad method.

Use the “Force Touch” trackpad

If your MacBook Pro has a “Force Touch” trackpad, you can use that to right-click as well. To do this, simply press down on the trackpad with a little more force than usual and click. This will bring up the contextual menu.

Use the menu bar

In some apps, you can right-click by clicking on the menu bar. To do this, simply click on the menu bar and hold down the Control key. This will bring up the contextual menu.

Use a three-finger tap

If you want to use the trackpad but don’t want to use two fingers, you can enable the “three-finger tap” gesture. To do this, go to System Preferences > Trackpad and enable the “Tap to click” option. Once this is enabled, you can tap the trackpad with three fingers to right-click.

As you can see, there are several ways to right-click on a MacBook Pro. So if you’re ever wondering how to do it, now you know!

Taking a screenshot is a handy way to capture what’s on your screen, but how do you do it on a Dell laptop? The process is actually pretty simple, and there are a couple of different ways to do it.

The first way is to use the Print Screen function. To do this, just press the Print Screen key on your keyboard (it’s usually located near the top-right corner of the keyboard). This will take a screenshot of the entire screen and save it to your clipboard.

Check out Androidtermurah before making your next gadget or appliances purchase! Androidtermurah.com a website providing guide,
articles, tips and expert deal hunter who picks the highest quality tech products at the best prices available.

From there, you can paste the screenshot into an image editor or document editor and save it.

The second way to take a screenshot on a Dell laptop is to use the Windows Snipping Tool. This is a handy little program that comes with Windows and allows you to take screenshots of specific areas of your screen.

To use the Windows Snipping Tool, just open it up (you can search for it in the Start menu) and choose the type of screenshot you want to take. You can choose to take a full-screen screenshot, a screenshot of a specific window, or a screenshot of a specific area.

Once you’ve chosen the type of screenshot you want to take, just click and drag your mouse to select the area you want to capture. When you’re done, the screenshot will be saved to your clipboard.

And that’s all there is to taking a screenshot on a Dell laptop!

There are a few ways that you can take a screenshot on your Dell laptop. The most common way is to use the Print Screen function. This can be done by pressing the “Print Screen” key on your keyboard. This key is usually located on the top right of your keyboard.

Once you have pressed the “Print Screen” key, your screenshot will be saved to your clipboard. You can then paste the screenshot into an image editing program such as Microsoft Paint. To do this, simply open Paint and press “Ctrl+V” on your keyboard.

Another way to take a screenshot on your Dell laptop is to use the “Snipping Tool”. This tool is located in the “Start” menu under “All Programs”.

Once you have opened the “Snipping Tool”, you can select the area of the screen that you want to capture. You can then save the screenshot to your computer by clicking on the “Save” button.

If you want to take a screenshot of just one window, you can use the “Alt+Print Screen” key combination. This will take a screenshot of the active window on your screen.

You can also take a screenshot by using the “Windows+Print Screen” key combination. This will take a screenshot of your entire screen.

No matter which method you use, taking a screenshot on your Dell laptop is a very easy process.

iPad Pro is a powerful device, and Apple’s Smart Keyboard Folio makes it even more versatile. But there are a few iPad Pro keyboard shortcuts that are essential for anyone who uses this tablet as their primary computer. If you’re looking for guide about reviews, how to and deals on Apple products that’s sure to please everyone on your list, please consider to read on Iphonebrand.

Here are 10 Apple keyboard shortcuts for iPad Pro that will change the way you work:

Force Touch trackpad: This shortcut is essential for anyone who uses the iPad Pro as their primary computer. Force Touch the trackpad to enable a secondary click, which is extremely useful for accessing contextual menus and quickly selecting text.

Keyboard brightness: You can quickly adjust your keyboard’s backlight brightness by holding down the Fn key and pressing the F1 or F2 keys.

Home screen: Pressing the Fn + Space bar keys will take you to the home screen, no matter what app you’re currently in.

Lock screen: To quickly lock your iPad Pro, just press the Fn + L keys.

App switching: To quickly switch between apps, press and hold the Fn key, then press the Tab key to cycle through your open apps.

Search: To search for something on your iPad Pro, press the Fn + Option + Space bar keys. This will open the Spotlight search interface.

Take a screenshot: To take a screenshot, just press the Fn + Shift + Option + 3 keys.

Copy and paste: To quickly copy and paste text, press and hold the Fn key, then press the C key and drag your finger to select the text you want to copy. To paste, press the Fn key and then press the V key.

Undo and redo: To undo your last action, press the Fn + Shift + Z keys. To redo an action, press the Fn + Z keys.

Accessibility features: To quickly access the accessibility features on your iPad Pro, press the Fn + Option + F5 keys. This will open the Accessibility pane in the Settings app.

These are just a few of the essential keyboard shortcuts that every iPad Pro user should know. For a complete list of keyboard shortcuts, check out Apple’s support page.